Pic.1

Pic.2
STOP !!!Brake ConversionThe (not very) definitive guide to the TR7 braking system |
|---|
The braking system on the TR7 has always been one of itĺs highlights... a simple case of whatĺs in the BL parts bin that we can use... the result, virtually the same set up as the Mini 1275GT... in a 2.0 litre sports car. Marvellous !!!
Now what I am going to try and do here is explore the different techniques I have heard to improve the braking efficiency of the car.
Firstly, the condition of the components. Are all components working correctly ?? Things to check...
- Calliper pistons moving freely when the pedal is pushed and releasing OK ?
- Brake fluid at correct level and not contaminated with water. (Brake fluid should be changed periodically to avoid this)
- Leaks in the system. Check the condition of all brake pipes and joints as well as the flexible rubber hoses
- Brake pads not worn past tolerance (ie. you can still see some pads rather than the back plate)
- Discs not ridged or warped
The above should be standard practice in servicing and MOTing the car, so I would hope that should be taken as read.
Possible changes...
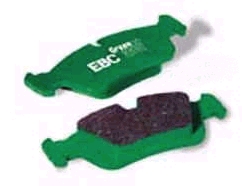
Uprated Brake Pads:(Pic.1) This is probably the cheapest way to improve braking performance as it just involves a straight swap. The uprated pads will give a better brake performance and reduce fade as far as possible while still using the standard braking system. A drawback and potential danger of using performance brake pads is that heat is required before they can work properly. This means if you spend a lot of time in traffic, or are just starting off for the day, the brakes can feel dead and unresponsive. It's not a major problem, but rather just something you have to keep in the back of your mind so as not to cause any unexpected mishaps.
Pic.1 |
Pic.2 |
|---|
Braided Brake Hoses:(Pic.2) At approx ú30 a set, not an expensive change. Likely to notice any difference ??? - No... they really are only for looks... any difference you may feel would more than likely be felt if you put a new set of normal rubber hoses on. On the downside, I have heard reports of brake cylinders blowing as a result of these being fitted because the air-tight system had no room to expand (the rubber gives a little normally allowing this). Having said that, Iĺve got them on my TR7, they look nice and Iĺve not had any problems... yet !!!
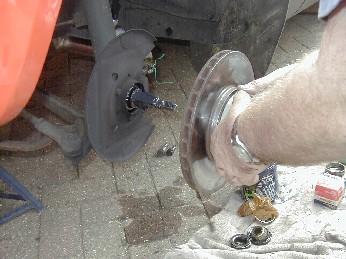
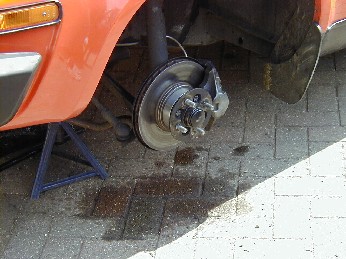
Uprated Master Cylinder and Servo:(Pic.3) Iĺve not tried this one myself but have it on good authority that the master cylinder and servo from a Sherpa van is bigger but still fits. The result is the ability to apply more pressure, hence better braking. An interesting concept as long as you donĺt mind clambering round the scrap yards to find one (oh and watch it if you have braided hoses - see above !!)
 Pic.3 |
 Pic.4 |
|---|
Installing a Ships Anchor:(Pic.4) Stops the car well, just a problem of reeling it back in after use.
Uprated Brake Kits:This is the route most people will end up taking. Itĺs also the most expensive and there are a whole host of kits out there depending on budget. Iĺve experienced 2 kits which are detailed below:
- TR8 setup: This consists of a bigger solid disc that fits on the standard hub and BL 4 pot callipers (as used in the Austin Princess) and calliper adapters for the brake pipes.
- Capri 2.8i setup: This consists of Capri 2.8i callipers and vented discs together with hub adapters and calliper adapters for the brake pipes.
Price - the TR8 setup is probably harder to find and usually more expensive when you do. Youĺll usually be looking to spend around ú150 for a second-hand kit or ú300 for a new one.
Fitting - The TR8 kit bolts straight on, as do the callipers. The only thing to remember is the bridge brake hose connecting one side of the calliper to the other or use a pipe splitter and two pipes going in. The Capri kit is a little more complicated. The disc needs a hub adapter in order to extend the centre to the same position as the original and for the bearings to run on (there are various specialists that sell these - prices vary from ú35 to ú80 depending on quality). The hub then bolts to the front side of the adapter, positioning the studs in the same place as normal. The Capri calliper mounting holes line up perfectly with the bracket on the car and are connected using short adapter pipes (again available from many of the specialists for around ú10). You will now hit the problem I didnĺt foresee.... Wheel clearance on the calliper.... This set up will work with standard 13" rims (steel and alloy), but will need spacers for the front wheels. These are only about 5mm (and again available from most specialists for around ú15) but solves the problem of the back of the wheel clouting the outer edge of the calliper. If you have 14" or 15" rims, they will be big enough to clear the calliper and therefore will not be a problem.
 Pic.5 |
 Pic.6 |
|---|
Performance - there isnĺt a lot to choose between the two. Where the TR8 setup gains having 4 pot callipers (greater force on the pad and disc when braking), the Capri setup makes up for by having vented discs (allowing better heat dissipation). If I had to choose between the two, I would opt for the Capri setup (even with the extra work involved) as the performance does seem slightly smoother and more progressive than the TR8... but I will add, this is just an opinion...
I realise Iĺve only just scratched the surface with the above and there are other setups including the Princess 4 pot callipers with vented discs and the Rover Vitesse setup. It's also worth considering Grooved discs (aid bite when the brakes are applied and will continually de-glaze the pads, therefore allowing the braking system to work at its optimum more of the time, however they will also wear pads far quicker) or Cross-Drilled discs (allow better ventilation which helps keep the temperature down and resist brake fade, without placing too much wear on the pads).